Showing posts with label frantic stamper. Show all posts

Saturday, March 01, 2014

one layer simplicity #3 and less is more #161

I made a decision today that whatever the new challenges today at One Layer Simplicity and Less is more, I would combine them to make a card, and hopefully one that would be useful.

Less is More announced yellow and green as the theme, so straight away I thought Daffodils, and then One Layer Simplicity announced use water. yes! I could do that. (although just read the one layer simplicity challenge again, and it specifically says to use water to create a background or spritz your inked stamp, so this card probably doesn't qualify - it's okay, the kind people at the challenge have allowed it.... and even edited the challenge to include the technique :D.  )

I used distress inks and a water brush to colour this daffodil stamp from The frantic stamper.

And that's a mothers' day card sorted!

Friday, October 21, 2011

cocktails and stripes


I've combined the stripe challenge at one layer wednesday with the cocktail challenge at less is more to make this really simple card.


To make the stripes, I randomly snipped a piece of copy paper with scissors, then cut them at irregular heights and angles. I sprayed the back with stick and spray, and then brayer the ink over the top.
I had previously stamped and mask the glass stamp from The Frantic Stamper's own range of stamps.


I stamped the word celebrate, lightly coloured the glass with pink pencil and applied glossy accents.

Friday, September 23, 2011

frantic stamper-sketch sunday


Here's my Card for Frantic Stamper's Sketch Sunday Challenge
All of the materials for this card are available from the frantic stamper and the main image is a stamp from the frantic stampers own range of stamps.

Friday, July 22, 2011

Nestability card


On the Frantic Stamper Blog today I have this quick card featured.

I made this circle card with a Nestabilities scallop die and a humorous birthday stamp by inkadinkado, and finished it with a piece of green apple grid ribbon.

I used the largest die in the scallop Nestabilities set to cut a circle card by overlapping it over the fold of the card.

I used the same die to cut from patterned paper and attached it to the card.

I used the 3rd smallest die to cut a white circle, then stamped and coloured the image. I stamped it again on scrap, coloured and cut out just the head and neck, and attached them to the card with dimensional adhesive.

I attached the white circle to the card. Lastly, I decorated the card with ribbon tied around the fold of the card.

I finished the card by cutting a flat edge on the back of the card to allow it to stand.

Friday, July 08, 2011

feelin' fruity!


The theme at PaperPlay Challenge is "fruity" I made this get well soon card, using The frantic Stamper's own range of stamps for the grapes and the script, the words were from a clear stamp set that I also got from the Frantic Stamper Website.

I took my favourite pencil on kraft card technique one step further, by stamping the leaf onto another piece of Kraft card, colouring and mounting with 3D foam.

Friday, June 10, 2011

buttons, flowers and twine...


At CAS-ual fridays there is a game of tic-tac-toe to play.


I chose the bottom row: buttons, flowers and twine, as this fit nicely with this set which has just gone onto the frantic stamper blog.

All of the products used on this set are available from the frantic stamper. (if you want any help finding any of the products, just ask)

Monday, June 06, 2011

The Kraft Journal- it's a guy thing


I'm sure if you've visited my blog before you know that I love pencil colouring on kraft card for quick and simple cards for the real people in my life. So I've really been taken with the challenges at the kraft journal where the theme this week is "it's a guy thing"

This card is made "for a guy". it may not be overly masculine, but I think guys appreciate "stylised cute"... I think I just made that term up!! lol. I also added the cute image to the envelope.

The stamp is by Inkadinkadoo and I got it from the Frantic Stamper (Humorous Birthday INK-CSL-97529 $9.99)

Saturday, May 28, 2011

less is more- pick a square


I love this week's challenge at Less is More. You have to pick one of the corners or the centre square of a card and only use that square, leaving the rest as white space.

I decided to pick the square I thought would be most difficult. Top Right. I decided that I needed something to either float or hang there to make it work.

So I made two. A full size (5") card with a hot air balloon from the frantic stampers own range of stamps, and a 2 inch mini card with bow heart from Stampotique (also available from Happy Daze)


I used Jenny Bowlin inks on both (they swipe really nicely) from Happy Daze and basic gray papers (from The Frantic Stamper)

I'm also entering this for Secret Crafter's Saturday Challenge where the theme is Clean and Simple

Thursday, May 26, 2011

Tutorial : swing card


I have a tutorial posted on the Frantic Stamper Blog today for how to make a swing card.

My technique allows you to make a swing card any size you like, with any (symmetrical) swing shape. This is the kind of swing card where you can see the whole of the swing bit, i.e. it doesn't hide part of it when the card is closed.

there's no template, just a pattern which you can apply to any shape, as long as you can devide its width into four, there's just a few simple rules
  • The swing shape needs to be vertically symmetrical.
  • You need to be able to measure its widest point, and divide this measurement by 4.
    • The key to this is find this measurement, make a note of it, and from this point just consider it a “chunk” or “measure” as all further measurements will just be a multiple of this.
    • In the sample I have made I have used a 4 inch square, as this is the simplest shape to explain it, but you could just as easily use a heart or circle, and any size can be divided by four.
  • The height of the shape and the final card are unimportant.
  • The width of the final open card will be twice the width of the shape.

if you do not understand the card instructions which are here please comment with your questions on this post and I will answer them.

Saturday, March 05, 2011

frantic stamper card

On the frantic stamper blog today, I have this card featured, using one of the frantic stampers own stamps. I love the way the girl 's hair blends into the sky and sea. I have coloured it with pencils.
The ribbons are attached using the immovable knot techniqe.

Thursday, February 17, 2011

Paper Sculpture Sympathy card


on the frantic stamper blog today, I have this card with instructions. I love the look of paper sculpture, and I wanted to recreate the effect using die cuts. This is such a simple card, but i think it's really effective.

Thursday, February 03, 2011

not a new card


I've already posted this card, but am doing so again today as it is featured on the frantic stamper blog. with instructions and links to products

Thursday, January 20, 2011

frantic stamper: shopper card


On the Frantic Stamper blog today I have this card. The french newspaper background and shopping post are from The Frantic Stamper's own range of stamps. The swirl is a prima stamp. The paper is 7 gypsies. Everything, including the ribbon is available from the frantic stamper.
The ribbon is attached using the immovable knot technique again.

Tuesday, December 28, 2010

created by hand: bubbles


The themes at Created by Hand this week are "out with the old" and "bubbles" I went with the "bubbles" for my image, but I also "got out my old" ( geddit?) making memories hole punches and hammer to allow me to make holes exactly where I wanted on my card. I rarely use these anymore since getting my cropadile, but I have a feeling now it's out, I'll be using it more.

The image is a stamp (bubbles post 7703-H ) by the frantic stamper


I gave the main image a bit of a "lift" by masking round it and spraying with iridescent spray and sparkle, but I don't think it shows that well on the photos.

Thursday, December 23, 2010

tag competition

For the remainder of the month the Frantic Stamper Design Team will be doing something a little different. We have all been busy making a wide variety of tags to share with you; sometimes we'll share two tags in one day. Though we are including the materials we used to make them, we won't necessarily be giving you step-by-step instructions. This gave us a chance for us to be creative during the holidays when things are a lot busier, while still, hopefully, providing you with some inspiration.

And Inspiration is what this is all about! We really hope you will be inspired to create some tags of your own.

We want to see YOUR tags. The design team will be collecting photos of your best tags for a special contest. On January 1, 2011, the team will chose and publish the photos the finalists' tags for you all to see, and to vote on. The winner will get to be a "Guest Designer" for a day on the blog, and will win a wonderful prize of merchandise from Frantic Stamper (www.franticstamper.com).

To participate, send a quality photo of your tag in jpeg format (please set the resolution low enough to keep the file size under 1MB), along with your name and email address to franticStamperContest@gmail.com before midnight PST, December 29, 2010. Please send only photos that you own the rights to, and be aware of copyrights of any images you use. In event of a tie in the voting, the Design team will make the final decision on the winner.

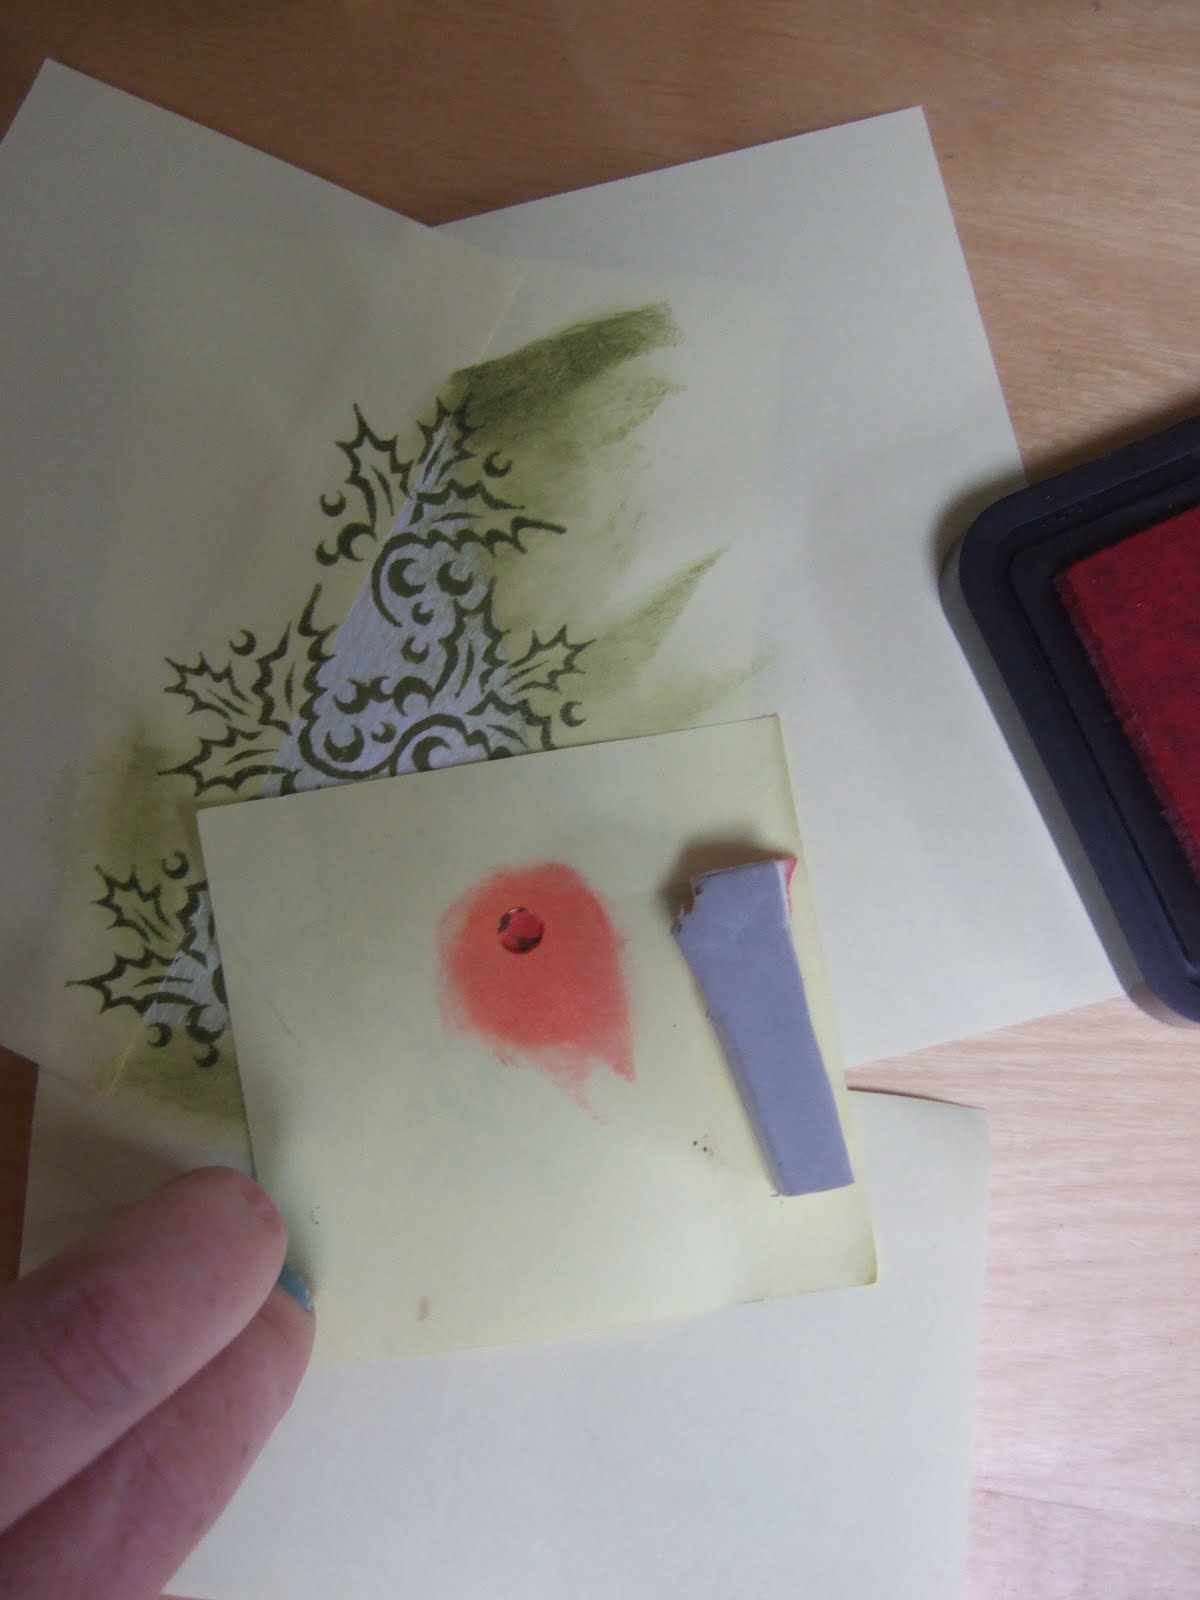
This tag is an idea for adding place names to a party table, by adding a tag to a peg (clothespin) to attach to a wine glass.

Sunday, December 05, 2010

OLW: back to basics


This week at One Layer Wednesday the challenge is to show what originally hooked you into stamping. I took a while to really "get" stamping. I used it, but didn't see the big attraction. One of the things that really sucked me in was script stamps, once I tried these there was no turning back. And of course I didn't just stop at one. I have loads of script stamps now and I still think there's room for more in my collection.
The first one I had was on a non-sequiteur plate, in fact I'm sure I'll be able to find something on my blog using it.

hang on... I'll be right back....

ah yes here and here

The one I've used today is one of the most recent ones I acquired, and is from the Frantic Stamper's own range of french inspired stamps, as is the Christmas tree. These are another bulk make. As they are so quick (ink stamp ink stamp done) I've rustled up about 25 in no time at all.
I apologise for the picture, it's too dark to do photos so I've scanned it.

Monday, October 25, 2010

Hanging Hearts


Continuing the pink theme for breast cancer awareness on the frantic stamper blog. I have made this very pink card. The design of this card actually came about by accident. it was originally mounted on a white card blank, but then I went and got ink on the white border, so I trimmed it down to square and then sat and wondered what to do with it...

I decided to make it into a book style card. I think I'll be doing this again.

A pretty good rescue, don't you think.

For details of all the materials and techniques please visit the frantic stamper blog. I'd love it if you'd leave me a comment over there

Monday, October 11, 2010

a sweet day


In honour of Breast Cancer awareness the Frantic Stamper are having a pink month, where all the projects have a pink theme. This is the first of my pink projects this month.
The instructions and stamp credits can be found on the frantic stamper blog. I would love it if you could pop over there and leave me a comment

Saturday, September 25, 2010

Holiday Happenings: trees, trees, trees


It's the 25th of the month, so it's time for Holiday Happenings again at Gingersnap Creations. This month the focus is on trees, so I used this stamp I recently got from the Frantic Stamper to make this card, using papers (basic grey) and ribbon that I also got from the frantic stamper.

I highlighted the image with sepia accents. I also made the black "gems" by punching circles of black card and add sepia accents.

Friday, September 24, 2010

easy holly christmas tree


I have made this ridiculously easy card for the winter wonderland "holly Challenge" but then I realised that it will also fit One Layer Wednesday's nature challenge.

I have made this card using masking techniques and a holly stamp from the frantic stamper's own range. This card will appear as a tutorial on the frantic stamper blog, but here's a quick peek at how I did the red "berries"